Winter Camping Trip January 2014
First winter trip ever
I've been wanting to get into winter camping for a long time, after 10+ years of canoeing
and hiking from March to November. "Cold camping" does not appeal to me, but "hot tenting"
has always sounded compelling! So, I got geared up in 2014, and completed my first
trip with a buddy in January 2014.
Gearing up
I had found a guy online in December who was getting out of the sport, and was
willing to sell me his tent and portable wood stove. He had purchased a 12'x12' Cabelas
4 season tent, and partially converted it into a winter tent (by removing the floor, and sewing
in a quality stove jack.) I also bought his ice chisel, and a snow shovel.
Everything was received in good order, and I tested it at home for a couple hours
successfully. I made some additional required changes to the tent to create a snow flap and
more velcro on interior vent flaps to minimize cold air entry. The stove came with a vertical
stove pipe (no elbow), which did concern me, but everything ran well in my home test, so
I decided to try it this way for the first trip.

I was amazed how much the stove warmed up the tent. I was able to get it up to 20C (from -5C)
after an hour or two, and enjoyed some scotch that my neighbor brought over when he saw me in the front
yard testing the tent!
Algonquin Park, Canisbay
Peter, a friend and regular canoe tripping friend of mine, agreed to join me on the
inaugural winter trip. We've survived the worst black flies I've ever seen on a prior trip,
so I figured us novices could handle the challenge.
With family and work responsibilities, we had little choice but to pick a weekend in January and hope for the best.
We had said we'd be conservative and cancel the trip if the weather forecast looked bad... but in all
my years of tripping, I've only been able to follow through with that kind of commitment once.
So, a few days before our trip we knew we were looking at some extreme cold and harsh weather, but simply
went anyway. We could see spots of sunshine in the forecast some days, and the wind didn't look so bad, and I'm sure
they can't be serious when they say -25C at night, surely!
We planned to go to Algonquin for the first trip, to give us a lot of choices of where to camp.
The nice thing about winter camping, compared to prime-season summer canoeing, is the lack of
advance reservation requirements. Simply show up at the park gate, and buy a permit for where ever.
The only rule in Ontario Parks is to NOT camp on any summer sites, and instead camp "in the bush".
This rule is mainly in place because winter camping is reasonably hard on the terrain, as you have to cut
a lot of firewood (standing deadwood only of course).
We arrived at the park office January 24th around 10am, and were happy to find out that this year,
the road to the car-camping park on Canisbay was cleared, due to construction on the water filtration
plant. So, we planned to drive up the road as far as we could, and travel across Canisbay to the far north
side and setup somewhere in the bush.
The road was ploughed almost up to the lake front, and we unloaded there. But, the work
crews told us we'd have to park the car back at the main gate (1km back), since the gate would be locked and
shut at night.
Of course, it was COLD. About -15C in at the time, and very crisp, with 10km wind gusts.
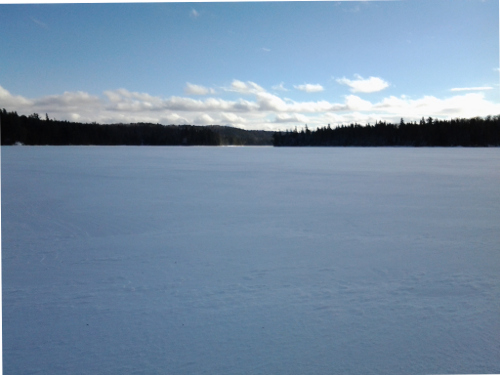
We got all our gear out and onto the sleds, and pulled our way down to the lake and across the
ice (which was very thick due to the unusually cold winter, no risk of falling in.)
After an hour of pulling, we got to the far side of Canisbay, and found a good spot with
lots of standing deadwood in easy reach. It was about 15 meters from the water, but seemed
reasonably wind proof (or so we thought!)
Camp site on north end of Canisbay
Prior to leaving, I had spent a lot of time reading books and at various online forums studying
winter camping techniques (the best of the bunch: http://wintertrekking.com.)
I quickly learned that the best strategies for winter camping vary enormously from summer canoe tripping.
And, since winter tripping (especially "hot tenting") is not that common, there are many different
ways people do things.
First thing, which I had done months earlier, was construct 'pulks' to pull our gear. I built mine,
using ice fishing sleds (
Canadian tire, Snow Trek 60 and
Snow Trek 45). I removed the pull rope, and using PVC 3/4" piping, made a pulk (search 'how to build a pulk', and
you'll find no end of guidance!) I kept my design very simply: eye bolts with cheap caribineers on the sled, and each
of the two poles ends with a PVC cap and small eye bolt. Instead of making a custom waist belt, we carried backpacks (mostly empty),
with caribineers at the sides to latch into the pole eye bolts. Each pole was 5' long, cross them, and you're good to go.
I drilled holes along the sides of the pulks, and we used bungees to hold down the gear. By using poles, instead of ropes,
down slopes are manageable, and crossing the poles makes turns all the easier.
The ice was about 50% bare, and with a tail wind, pulling the sleds was pretty easy.
It took us about 2 hours to setup the tent, stove, and cut some wood.
Water in winter
After cutting wood, we got our water. I had debated whether an ice auger or ice chisel was best, and
decided in the end on the latter. And, I'm glad I did! This custom ice chisel I bought second hand
is outstanding (looks just like this). I made
quick work of cutting a hole 1' down, until we hit a slush layer that primed the hole with water.
I bought a short handle for the chisel head, rather than bothering with fashioning one in camp, which I'm glad
I did. I also bought this
hand pump to suck water into a collapsable plastic
camping container. This worked extremely well, although I learned to blow the lines and pump of water when done,
so it doesn't freeze up. What I liked best about the hand pump was the ability to fill the big container
very quickly and easily, which provided enough water for all needs for two days (drinking, cleaning, dishes, etc.)
Also, that volume of water does not freeze up easily overnight when temperatures drop below zero.
While the stove was running, we just kept the water container 3' away form the stove, and that kept
it unfrozen.
I learned online that using a traditional water filter in the winter is not
possible, since the carbon filters freeze and can break. So, we relied on boiling.
This takes some time, so that you're basically boiling water constantly.
Although a "rolling boil" is recommended, we just got the water to bubbling,
and never had a problem. The worst of it was the taste... carbon water filters
do a fine job of keeping fine particulate out, which improves the taste.
Boiled unfiltered water is not so tasty!
Next year, I will invest in a
UV water purifier and pre-screen as a faster and easier alternative.
A good winter tent
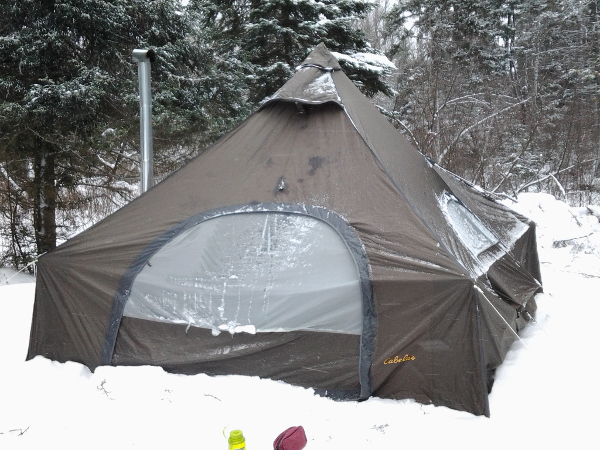
When I had started gearing up for winter camping, I had of course stumbled on
Snow Trekker canvas tents, which are
the most common and popular. But, they are very expensive, heavy, and must be ordered
from the US. One alternative some people do is convert a 4 season nylon tent into
a winter tent, as was done to the second hand one I bought
(a
12'x12' Cabelas tent.) A single centre pole tent is good in the winter, in that
snow loads simply sweep off the sides. Indeed, we received 6" of snow over the weekend,
and the tent design worked well. My tent has a ton of guy lines, which did prove
necessary to stake out completely. Initially, I had ignored staking a handful, figuring it was good
enough. But, the wind shifted that night, making the sides flap quite a bit. So, the next
day we retightened all the lines and staked the remaining four, which helped a lot.
I had wondered prior to the trip how to stake out the lines in the snow. We had over 3'
of snow, so getting to ground was not possible. I had purchased a bunch of
plastic tent stakes, but these proved useless. In the end, what worked best was just burying a 1" by 10" stick
a foot or so down, and tamping it down with our snowshoes. Low-tech to the rescue!
Since I'm used to small summer tents, I was certain this 12'x12' tent would be huge and plenty of room, especially
for only two people. But, you live in your hot tent with winter camping, not just sleep in it.
We could have done three people, but it would have been cozy. Four people would have been far too cramped.
The portable wood stove
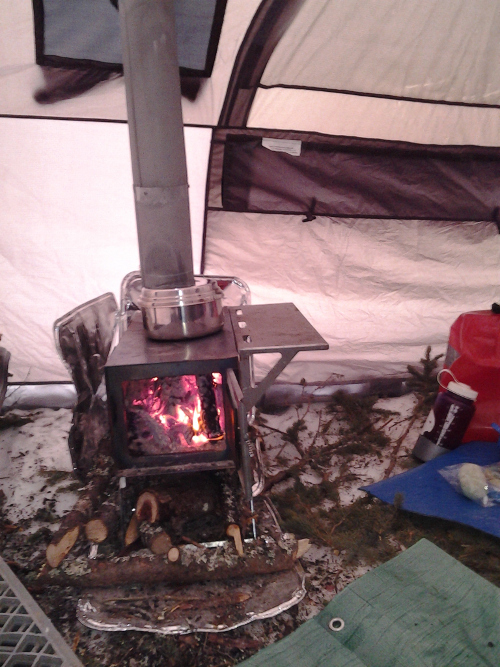
The wood stove I bought second hand, a Kni-co Packer,
worked quite well (it had never been used when I purchased it.) Packed to the brim once running strong,
it could last about 1 to 1.5 hours. At -15C outside during the day, we had no problem getting the areas
within 5' of the stove up to 15C. But, the stove did not heat the far areas of the tent, and any wind
that shook the tent brought the temperature down quickly.
The bad news was that my home test of the vertical pipe was misleading: some coal sparks did
make it out of the stack and landed on the tent roof. Thankfully, they were only pinprick holes, but
I did have to patch 20 small holes on return. Back home, I sought out a custom pipe fitter and
got a custom elbow made to get the stack away from the tent outside. On the second trip (in February),
I used a big stick to prop up the end of the stack, and we got no sparks landing on the nylon.
The only challenge was that the spark arrestor I had on the end did not function properly on an
angle, and got completely clogged up with creosote (backing up the stove inside the tent at one point!)
Thankfully, the arrestor was not required, and simply removing it solved the problem.
I had purchased a bunch of light-weight tin foil trays for side shields and under the stove.
The side pans worked very well to reflect heat away from the wood pile on the left and from the back wall,
but were too light for under the stove. On the next trip, I used two old cookie sheets which was an improvement.
I knew snow melt under the stove would be an issue, and on both trips I did not properly prepare the stove
area. Next time, I'll layer a healthy amount of wood sticks down first, then put the cookie sheets on top.
It took some time learning how to maximize the heat from the stove. Leaving the door open helps, as does
keeping a flame going, rather than just red coals. It was around -20C that first
night, windy and snowing. We planned accordingly, and chopped enough wood to keep the fire going all night.
I slept near enough to the stove door and wood pile to get up every hour or so, and get the stove going.
A couple times I had to light again, but most times I could restart it from the coals. I certainly didn't sleep
well that night, although I never sleep well on camping trips, sadly. By morning, we certainly did not have
a lot of wood left... it's imperative to cut a ton of wood. We filled the smaller sled inside the sled, but kept the
larger sled full outside. At bed time, we restocked the inside sled completely, and it was pretty much exhausted
by morning.
Cooking on the stove
Although my plan was to cook all meals on the wood stove, I did bring my gas camping stove as a backup.
Thankfully, I was able to cook every meal on the wood stove, with patience and practice. Things take longer
to cook, and you need to get flames licking up against the underside of the stove, but it works.
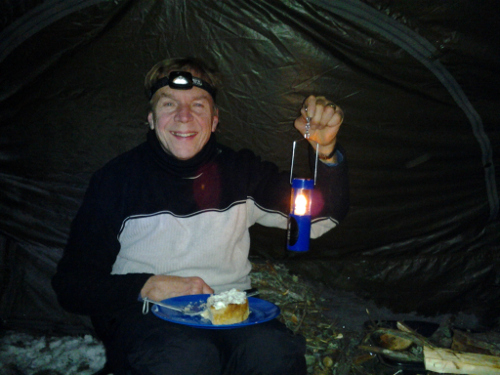
I have an
outback oven, which I use on most canoe trips to bake desserts and some meals (like quiche, sheperd's pie,
pizza.) So, I experimented on this trip to bake a cake, since it happened to be Peter's birthday
as well! Using the cozy did not work at all, as the heat from the stove pipe and surface is just too hot, and sorched
the material (even when I folded it up). What did work was using just the heat dissipator (without the wire rack)
on the stove top, then the pot, then I used my gas stove wind screen around the pot, then the ground shield for the
gas stove on top. By cooking at the front of the stove where the heat was less, I was able to get the temperature
gauge close to the 'bake' zone, and the cake did set after 50 minutes. And, voila!
Sleeping system
I have -12C duck down sleeping bags, which I've used down to -5C successfully (with clothes.) I also have
a sleeping liner. So, for this trip, I planned to put the down bags inside a +8C summer bag.
I had some leftover bits of solar pool cover, enough to make some good sleeping mats. This was an unusual
2 mil. thick laminate material, not "bubble wrap". So, it was light AND easy to roll up very tightly.
I made very large mats up (8'x4'), and we used
Exped air mats on top of that.
This sleeping system worked very well, even when the second night it dipped to -35C! I own too many sleeping
bags already, and high quality down bags rated to -20C or more are extremely expensive.
Hiking in the cold
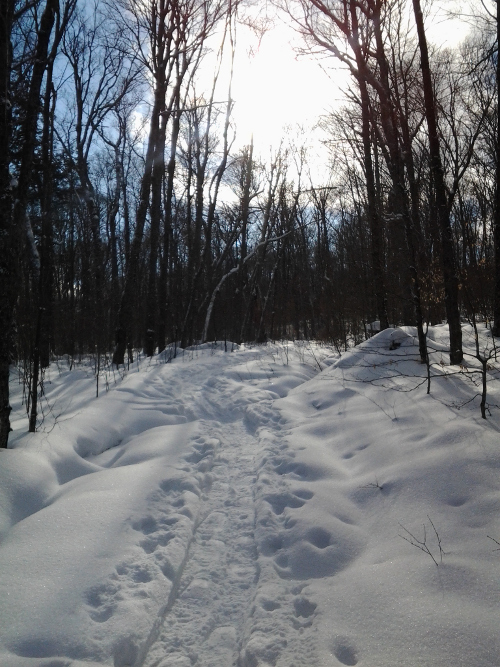
The second day, we snow shoed for a few kilometers on some ungroomed cross country ski trails behind us, to the north.
The ski trail map indicated a vault toilet on the trail, so we planned to wait on the requisite bodily
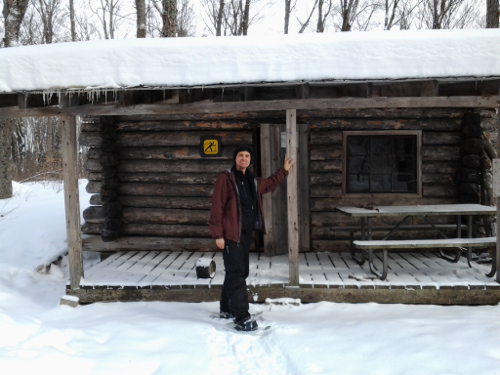
functions until after breakfast and our hike. Alas, we could find the vault toilet, although we did find the trail.
We eventually went much farther on the trail to a second marked hut, which did indeed have a toilet out back, thankfully.
I had wondered what people did for 'poop' on winter trips. Asking this question online brought a wide range
of answers, including collecting and burning the fecal matter in your wood stove (ick... not gonna happen),
to simply squatting in the snow in a less travelled area. We ended up shovelling a 4'x4' area down to the
ground, and using a large branch. This worked fine. On my second trip, I clued into using my ice chisel to
further improve on this, by cutting open a 1' deep hole in the actual ground. When we were done, I was able to
bury it completely, no different than summer trips on crown land.
On the last day, we had to pack up in the extreme cold, so we certainly didn't waste any time.
The sledding back was far more difficult, as the ice was now covered in hard snow. And we were lucky to get the car
started, given the -25C temperature (note to self... if you think your car battery needs replacing, do so BEFORE
a trip into back country where your car will be parked miles from anywhere in the cold!)
Overall, I was pleased with my gear and felt we did well given our novice skills with winter camping.
I learned a ton, which I'm sure will make future winter trips all the easier.
|
